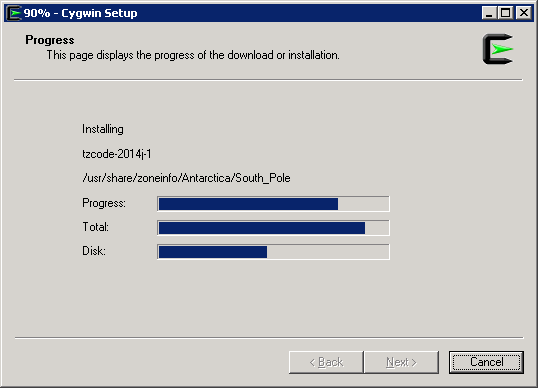
Oracle Enterprise Manager Cloud Control 12c offers an easy way to add various targets with the Add Targets Wizard over the GUI. Beside normal hosts, databases, listeners and ASM also Exadatas, Middlware, Cluster Services and many more, espacially for monitoring and also with more or less configuration options. But if you want to integrate a simple server first, you need a so called Agent. The agent is an application which monitores directly on the host and communicates with the Enterprise Manager.
At first you need the agents deployment sofware. You will only get these over the Self Update Service of the Enterprise Manager in opposite to earlier releases. Choose the required OS platform and load the software. In our case Agent Software (12.1.0.3) for Microsoft Windows x64 (64-bit). This works for both Windows Server 2008 and also Windows Server 2012.
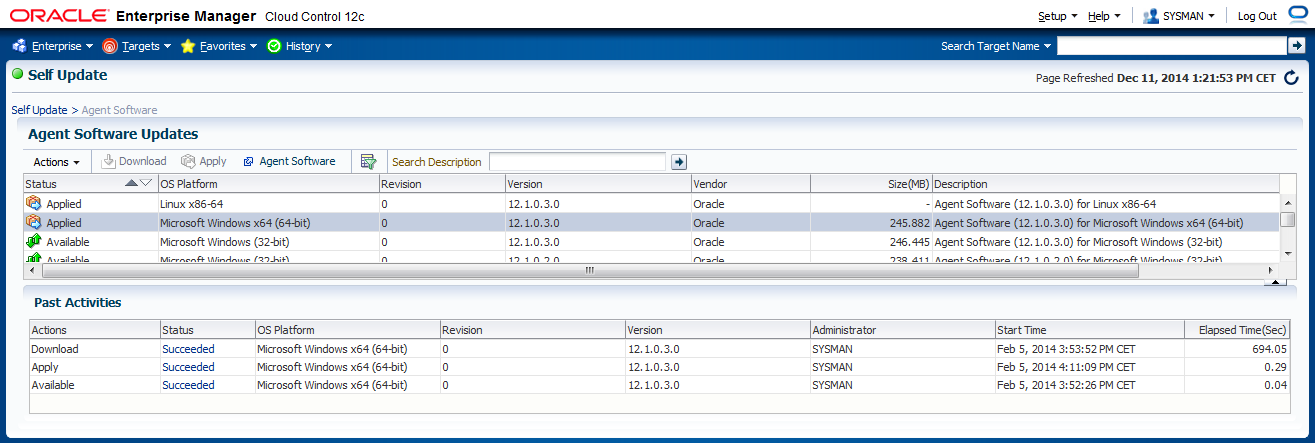
Setup > Extensibility > Self Update > Agent Software
If you don’t trust the GUI you can display the available Agents over command line:
$OMS_HOME/bin/emcli login -username=sysman -password=******

Login successful

$OMS_HOME/bin/emcli get_supported_platforms

———————————————–

Version = 12.1.0.3.0

Platform = Linux x86-64

———————————————–

Version = 12.1.0.3.0

Platform = Microsoft Windows x64 (64-bit)

———————————————–

Platforms list displayed successfully.
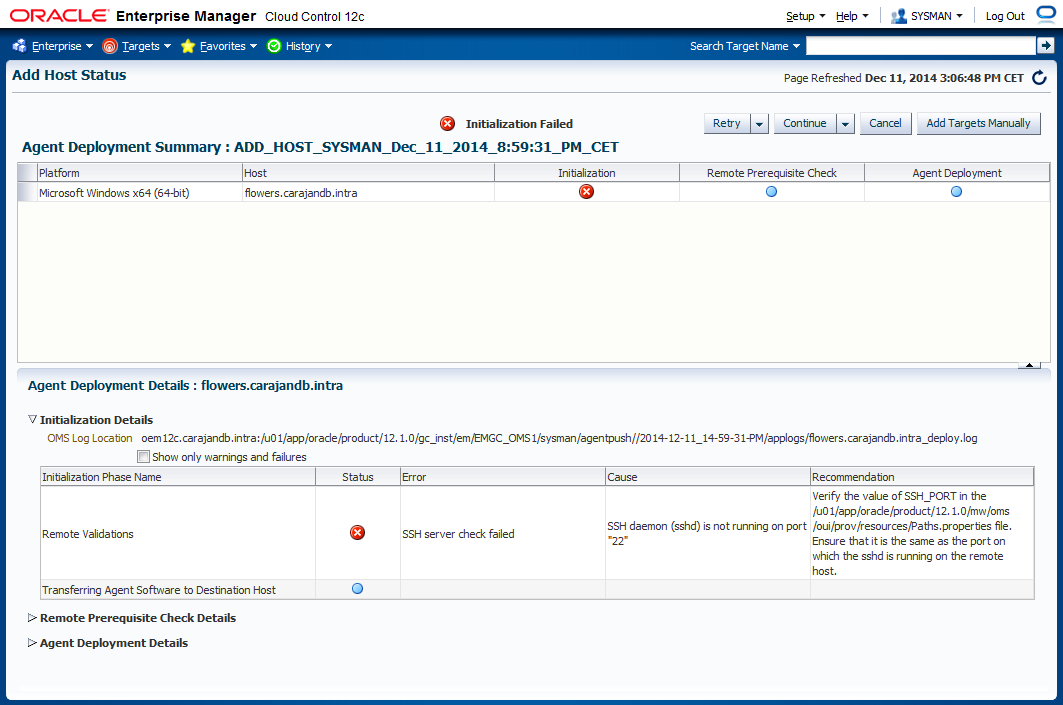
Now we face a crucial decision. For deploying the Agent to the host over the „Add Host Targets“ you still need a SSH access also on a Windows machine, otherwise you will get an error message trying to install the agent: SSH server check failed – SSH daemon (sshd) is not running on port “22”.

There is an alternative to create an Agent image with command line, which is directly installable on the target host. By that you avoid the necessity to provide SSH access over Cygwin. For an individual version and a few Windows machines that would be surely manageable. As soon as you come to various machines it would be more difficult, furthermore you need to create an image for every new agent and operating system version and install it particularly on every machine this multiplies the effort. In that light the opportunity to deliver a secure SSH access to the Windows machine with Cygwin seems to be much more attractive and feasible. In addition, with Cygwin you don’t implement an open SSH access or other mannered free access to the windows machine. No security configurations will be bypassed. Only the required Cygwin-packages will be installed and a single domain user (Oracle DBA) gets password secured access. Finally the usage of Cygwin with the Add Host Targets Wizard is certified and supported by Oracle (Ref.: https://docs.oracle.com/cd/E24628_01/install.121/e22624/preinstall_req_cygwin_ssh.htm#EMBSC151).
In case you still don’t like Cygwin, you’ll find an instruction for an Agent installation without Cygwin in following Blog: OEM 12c Agent deploy on Windows – no problem without Cygwin.
For everyone else it will proceed with Cygwin installation.
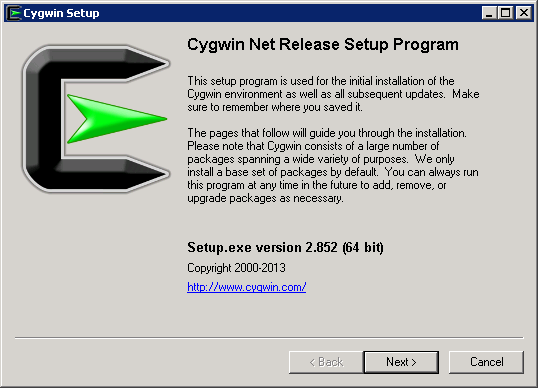
Cygwin installation
You will find the pre-installation package here: https://cygwin.com/install.html (in my case setup-x86_64.exe)
Before you set up the SSH access over Cygwin you have to consider that there are no other SSH services, which eventually will cause conflicts. Oracle explicitly mentions OpenSSH and MKSNT as SSH services, which has to be stopped and deleted from the PATH variables as well – this constraint of course takes effect for every other service that uses or block the SSH port 22 – headword: Firewall.
For installation and first-time set up you need administrative permissions.

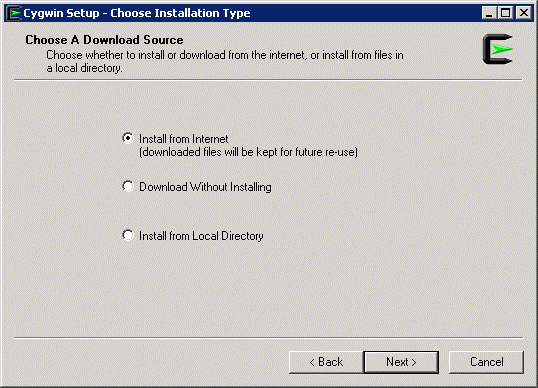
You can take the installation files later and move them to the next srever. By that it is not neccessary to download everything repeatedly. On the next server you can choose „Install from Local Directory“ and select the already downloaded files.
C:\cygwin !
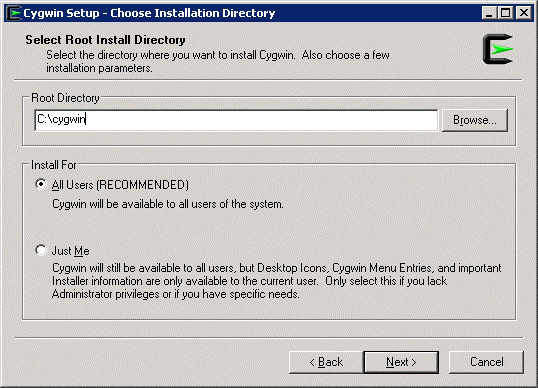
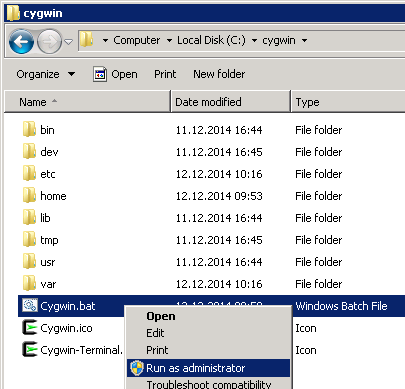
Very important!: As Root Directory you should choose C:\cygwin. The default path for the Enterprise Manager is set to C:\cygwin. You can change the path in $OMS_HOME/oui/prov/resources/ssPaths_msplats.properties. Usually SSH_PATH, SCP_PATH, MKDIR_PATH, SH_PATH, CHMOD_PATH and TRUE. But have in mind that you have to provide a possible D: drive on every machine, otherwise you had to adjust here every time.

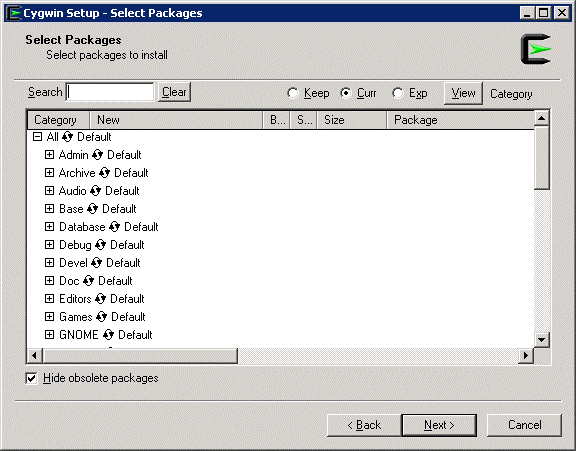
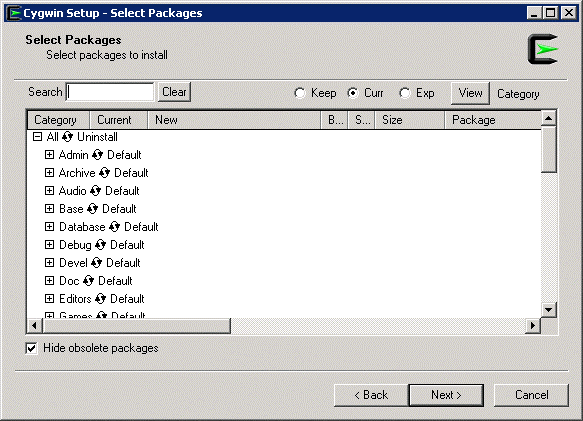
Arrived at the packages choose only the following:
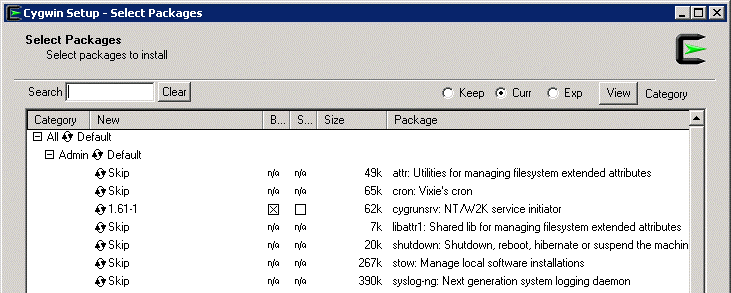
Admin > cygrunsrv
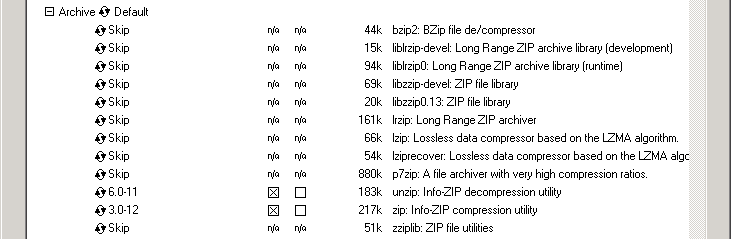
Archive > unzip + zip
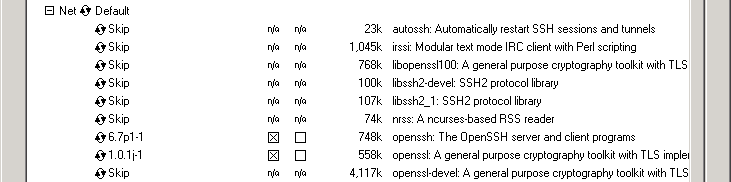
Net > openssh + openssl

Let the routine install all additional packages.

Ready
Cygwin configuration
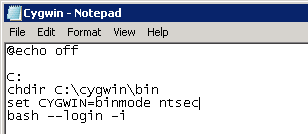
Edit C:\cygwin\cygwin.bat and add following line between chdir … and bash … :
set CYGWIN=binmode ntsec
Additional code cygwin.bat:
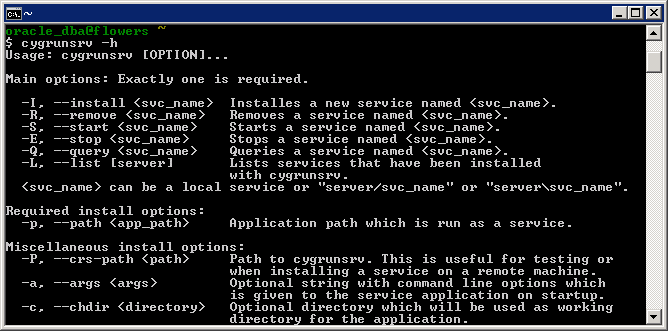
Check for correct installation:
Run C:\cygwin\cygwin.bat “As Administrator” and following command
cygrunsrv -h
Help should show up. If there is a problem at this point you have to re-install Cygwin.
It continues with the SSH configuration.
ssh-host-config
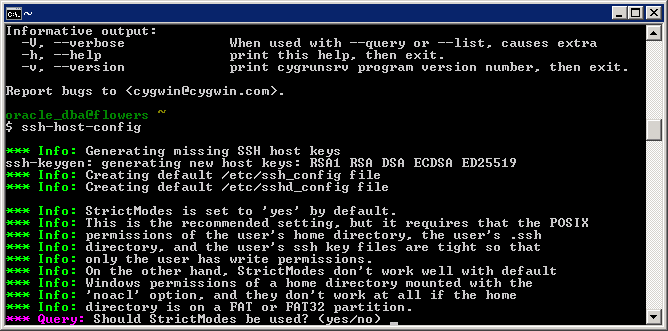
*** Query: Overwrite existing /etc/ssh_config file? (yes/no) yes

*** Query: Should StrictModes be used? (yes/no) yes

*** Query: Should privilege separation be used? (yes/no) yes

*** Query: new local account ‘sshd’? (yes/no) yes

*** Query: Do you want to install sshd as a service?

*** Query: (Say “no” if it is already installed as a service) (yes/no) yes

*** Query: Enter the value of CYGWIN for the daemon: [] binmode ntsec

*** Query: Do you want to use a different name? (yes/no) no

*** Query: Create new privileged user account ‘cyg_server’? (yes/no) yes

*** Query: Please enter the password: ******

*** Query: Reenter: ******
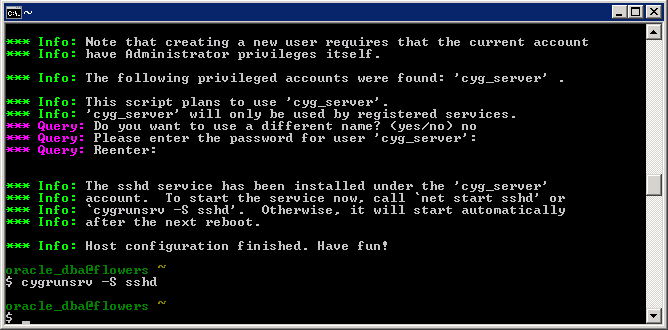
After entering cyrunsrv –S sshd the service should start.
The next step is to configure the user, who will finally access the machine over SSH. Whose login information will be deposited in the Enterprise Manager later. Therefore the access from the OEM server should be possible.
I’ve gone the easy way and installed Cygwin directly with the domain Oracle DBA User with administrative permissions. By doing this the user is already implemented. If you want to add another domain user enter the following code in the Cygwin command window:
/bin/mkpasswd -d -u oracle_dba >> /etc/passwd

mkdir -p /home/oracle_dba

chown oracle_dba /home/oracle_dba
For a local user –l instead of –d.
This is the step where you can work on the /etc/passwd and delete all unnecessary user and limit the access for Cygwin itself on a minimum. For that you have to backup C:\cygwin\etc\passwd and edit it directly or over Cygwin command line with vi /etc/passwd.
In every case you have to enter following code:
chown oracle_dba /var/log/sshd.log

chown -R oracle_dba /var/empty

chown oracle_dba /etc/ssh*

chmod 755 /var/empty

chmod 644 /var/log/sshd.log
Depending on the version sshd.log doesn’t exist, which is negligible.
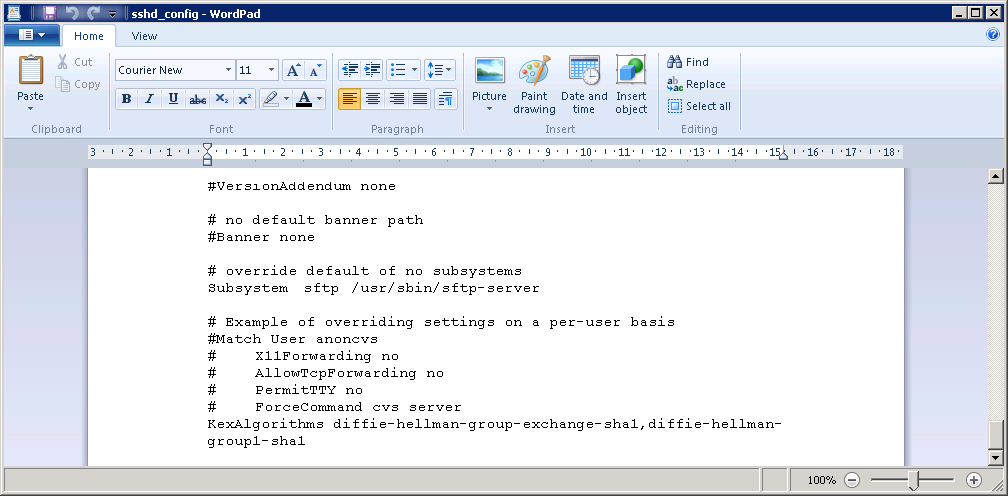
After saving C:\cygwin\etc\sshd_config you have to add the following line in sshd_config folgende at the end:
KexAlgorithms diffie-hellman-group-exchange-sha1,diffie-hellman-group1-sha1
Hint: The file is much better readable with WordPad.
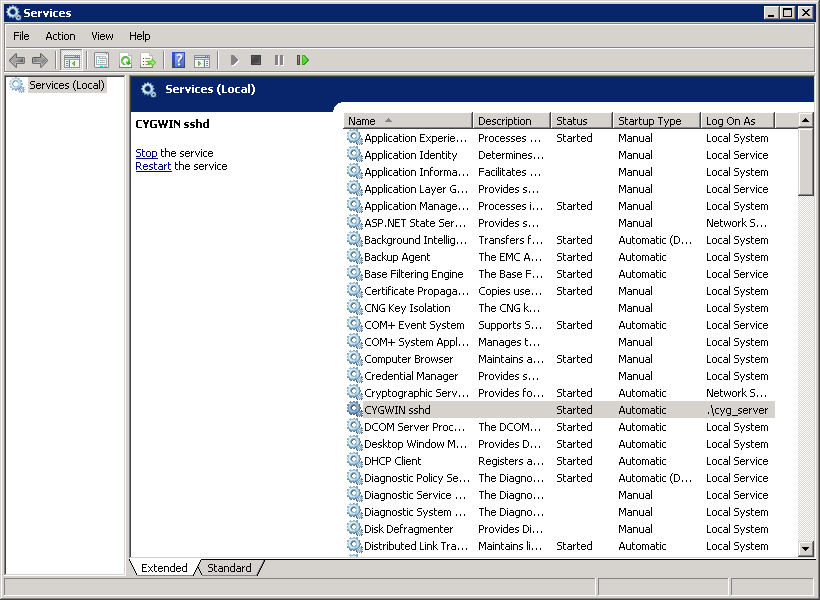
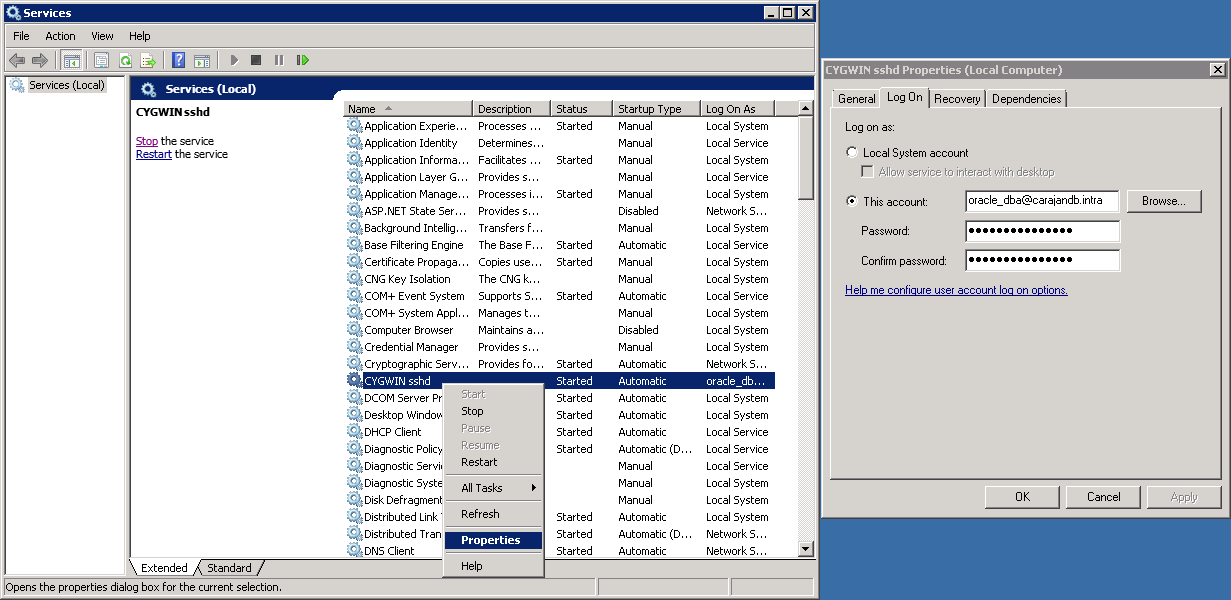
Change the Log On for the CYGWIN sshd service according to your access user. Services.msc > CYGWIN sshd > Properties > Log On
When the service starts properly you can test the access directly over the OEM server:
oracle@oem12c[DBOEM12C]% ssh -l oracle_dba flowers ‘date’

oracle_dba@flowers’s password:

Fri Dec 12 23:34:56 WEST 2014
After password prompt the date should show up. The SSH access works!
Agent deploy
Now to the real cause of our work: Agent Deploy.

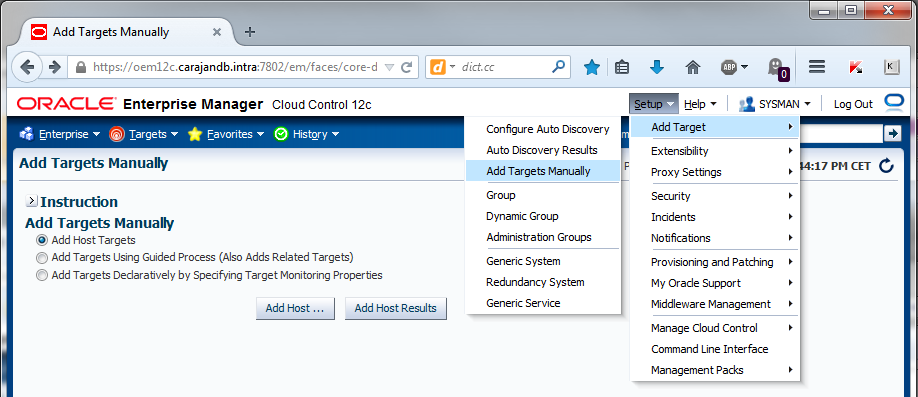
Setup > Add Target > Add Targets Manually > Add Host Targets > Add Host …
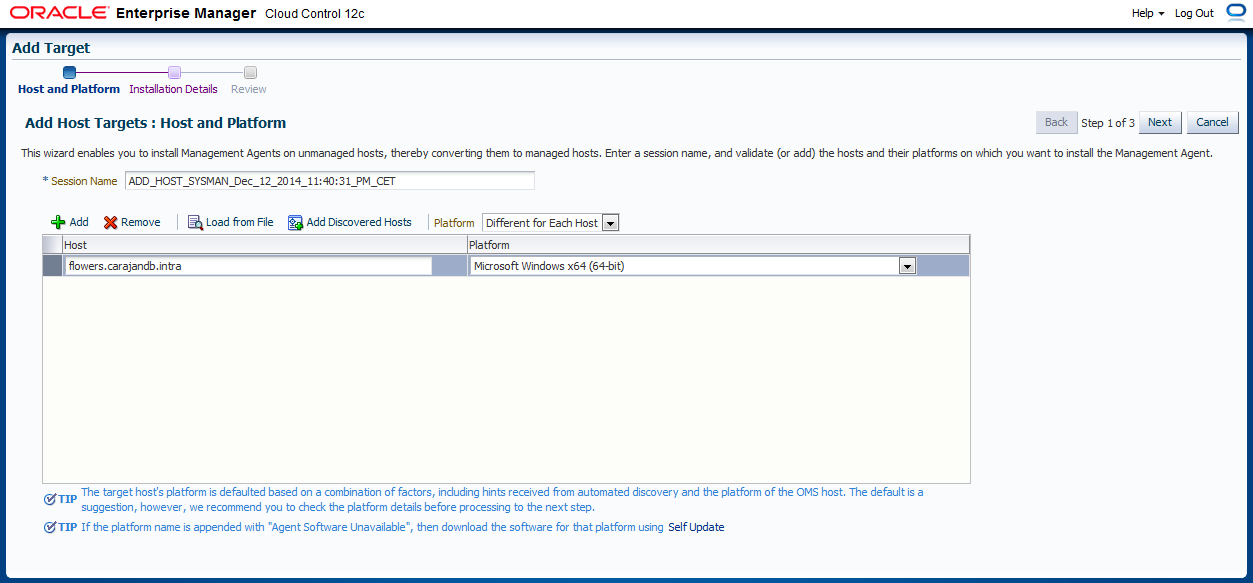
Specify Host and Plattform > Next
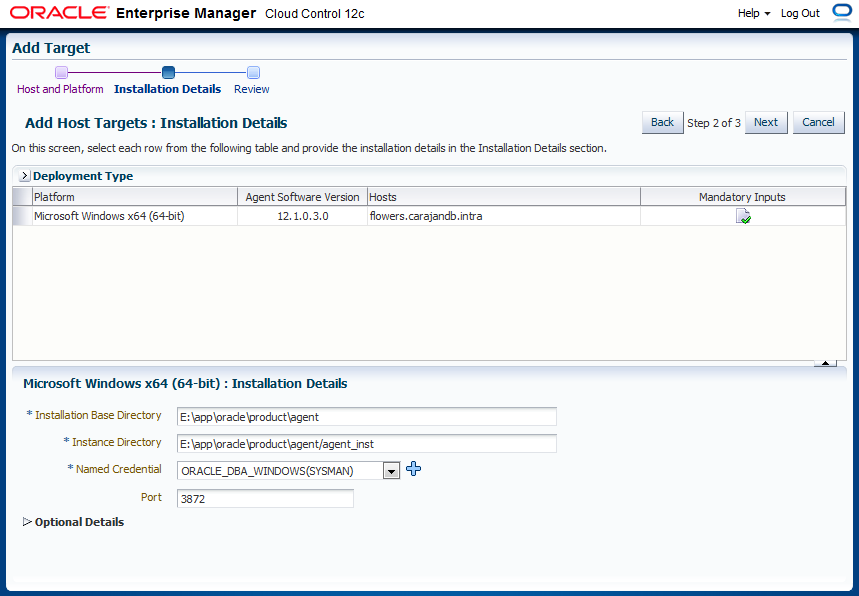
IMPORTANT: Here it depends on the Named Credentials. Lower and Upper Case will be considered. The login information must be similar to the data deposited in the passwd (C:\cygwin\etc\passwd). You can freely choose the Installation Base Directory and the Instance Directory will be added automatically.

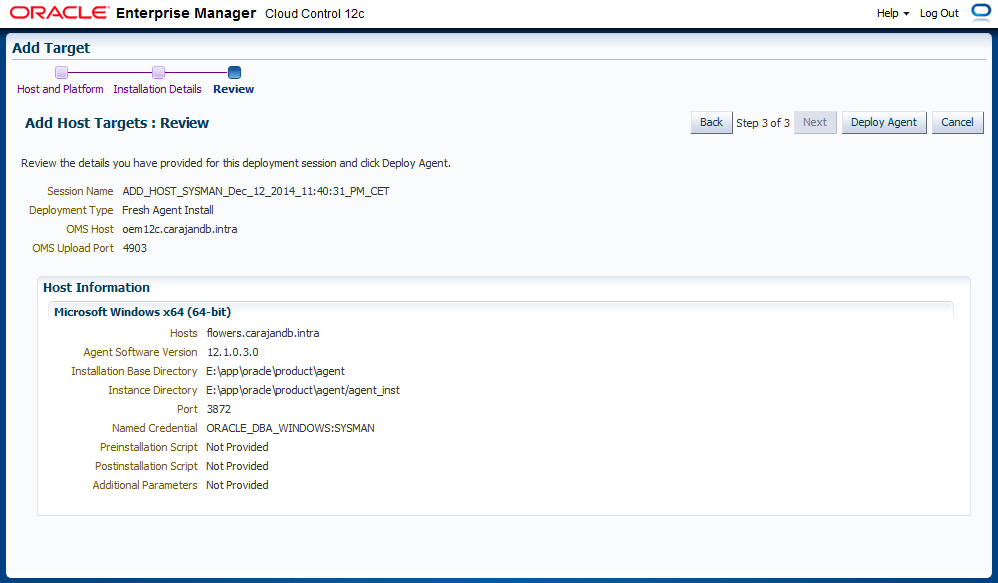
Deploy Agent
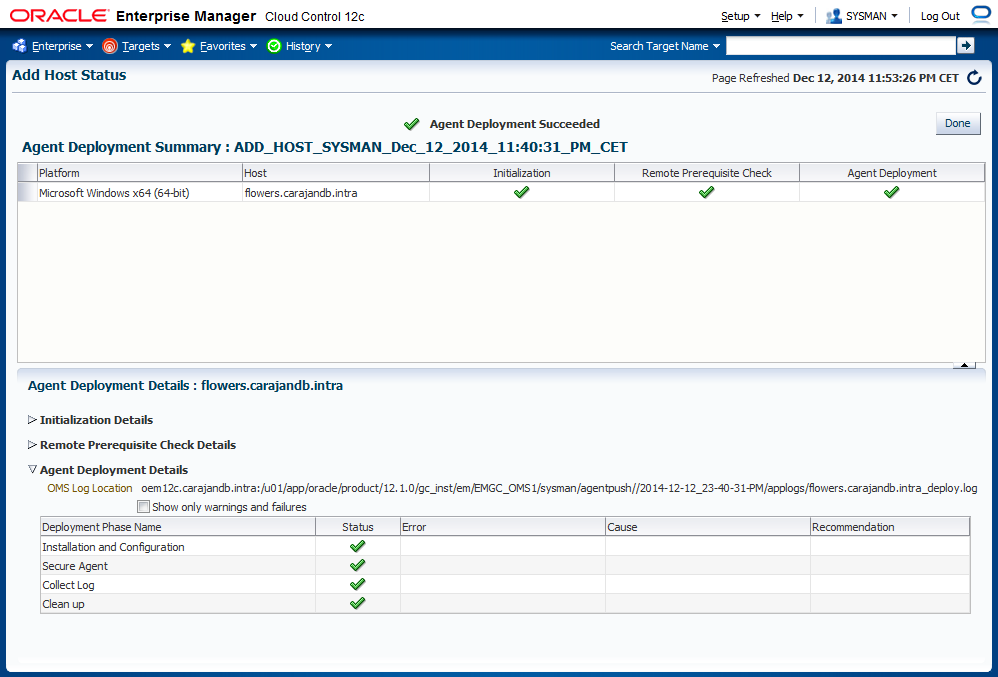
Congratulations!
Cygwin completely uninstalling
At the end a roll backwards. If you want to delete Cygwin start the setup.exe. Run through the setup until you reach the package selection and click next to All until Uninstall appears, Next, Next, Finish.
Unfortunately a rest of files lefts over. To clean that enter following commands:
C:\> takeown /f C:\cygwin /r /d y

C:\> icacls C:\cygwin /t /grant everyone:F

C:\> sc \\localhost delete sshd
Now you’re able to delete the Cygwin folder. The last crumbs are the local user cyg_server and sshd plus two registry entries under HKEY_CURRENT_USER\Software\Cygwin and HKEY_LOCAL_MACHINE\SOFTWARE\Cygwin, which you can safely delete.


Nos
Great !! Thanks. It is much clearer now. After I successfully install, I will make more comments. Thank you Sir !:)
Nos
[b]Thanks for a very detailed write-up !!! Everything is clear except here : [/b]
The next step is to configure the user, who will finally access the machine over SSH. Whose login information will be deposited in the Enterprise Manager later. Therefore the access from the OEM server should be possible.
I’ve gone the easy way and installed Cygwin directly with the domain Oracle DBA User with administrative permissions. By doing this the user is already implemented. If you want to add another domain user enter the following code in the Cygwin command window:
/bin/mkpasswd -d -u oracle_dba >> /etc/passwd
mkdir -p /home/oracle_dba
chown oracle_dba /home/oracle_dba
For a local user –l instead of –d.
This is the step where you can work on the /etc/passwd and delete all unnecessary user and limit the access for Cygwin itself on a minimum. For that you have to backup C:cygwinetcpasswd and edit it directly or over Cygwin command line with vi
[b]Please explain what account are you referring to ? do you mean the O/S account to access the Windows machine ? or the Grid Control sysman account ?[/b][b][/b]
Sebastian Winkler
In this case I mentioned the domain user which is the as you called it O/S account to access the Windows machine. Take a closer look into the /etc/passwd in the cygwin directory and you can see that there’re already all (local) accounts listed you can find on your Windows machine under Users and Groups. To get access with the domain account you have to register him this way and give him the right permissions. Be aware of upper- and lower case because the Unix system (for ssh) is case sensitive.
Tesla
Hi..my /etc/passwd file is empty
Sebastian Winkler
Hi Tesla,
there seems to be something wrong with your installation/configuration. Have you just tried to create a user with this command: /bin/mkpasswd -d -u oracle_dba >> /etc/passwd ? Did you get an error message?
Regards
Sebastian
Tosh
Thats some awesome stuff right there. Cheerz bro!!!
takehisa miyakawa
greate information 🙂
KexAlgorithms info 🙂
DBA
Don’t forget, if you’re allowing access from outside the host, to add an inbound rule for port 22 to the Windows Firewall allow list.
C
For some reason I needed to use the full name with server to get the ssh command to work. Ex.:
ssh SERVERNAME+ora_dba@SERVERNAME ‘date’
If anyone is having the same issue, hope this helps!
C
Update to the previous comment. I edited the /etc/passwd file and removed the servername prefix. Works as stated above now.
C
Thank You Sebastian for the excellent tutorial! I owe you a beer! 😀
Sritama Majumder
I am getting shell path validation falied in OEM server , Can you please help me?